|
If you’re wondering what air in fuel system symptoms is, don’t worry. I’ll show you a few tell-tale signs that illustrate the seriousness of this problem. This blog post will help you understand what the symptoms are and how to identify whether or not your vehicle is suffering from the air in fuel system problems. The quick answer: Air in fuel system symptoms varies, depending on the gasoline or diesel engine type. Your engine may experience low power, misfiring, or vibration. Air in Fuel System Symptoms in Gasoline EnginesGasoline engines commonly experience the following:
Fuel system components can be damaged due to increased high fuel pressure created by increased air moving through the system, but it mainly affects other parts of the vehicle fuel system. Air in Fuel System Symptoms in Diesel EnginesDiesel engines commonly experience the following:
What Causes Air Getting into The Fuel Supply System?There are a few things that can cause the air in the fuel system: 1. Engine oil leaks
If there is a leak in the engine oil system, it can allow air to get into the fuel system. The high pressure of the leak will cause pressure build-up in the other parts of the fuel system. If you hear an unusual noise coming from your engine, such as metallic noises and banging noises coming from your engine, this means that there is a leak. Why does this happen? The turbocharger frequently receives high-pressure flammable gases. These gases are pressurized to improve the engine’s power. If the engine oil becomes contaminated or dilutes, it can result in poor sealing of the gaskets creating excess oil leakage and clogged fuel filter. 2. Fuel leaks
Diesel engines are more susceptible to fuel leaks because of their nature. Diesel engines are frequently used in trucks and buses, which are subjected to frequent bumps and vibrations during transportation. This puts extra pressure on the engine’s fuel system, which can cause leaks in the lines, fuel hose, and seals. Air can also come from a cracked or damaged air bubble in a fuel line. This is a common problem among vehicles with electronic fuel injection systems. 3. RefuelingAir can enter the fuel system during refueling. Potential sources for this include bad connections at the gas pump and the scavenging of air from the atmosphere by oxygen sensors or other components that are sensitive to air. Air can also enter the fuel system when the tank is overfilled, which results in the fuel tank’s sump deformation. This problem can lead to many issues within the fuel system. How To Bleed Air Out of The Fuel SystemThe first step you need to take is to start the engine and let it idle for a few minutes. The purpose of this is that the engine’s fuel system components will be heated up by the flow of fuel that will allow them to expand. This expansion occurs because the oxygen content in the air increases as it heats up. This can remove excess air from the fuel lines and injectors. Do not rev the engine during this process since you will throw a wrench into your entire system. When the vehicle engine is warm, you can put a wrench on one of the lines or injectors and open it up until you hear a “clack” sound. This means that the line is air-tight and air will not enter it anymore. Repeat this step for all of the lines and injectors of the fuel system. If this does not work, you need to take the vehicle to a mechanic. If your engine is still plagued by air in the fuel system, you should hire a professional mechanic to inspect the problem. It’s important that you hire someone who has experience working on vehicles like your cars. Tips to Maintain a Clean Fuel SystemIf you know how to keep the fuel system clean, it’s less likely that your car will have any trouble related to fuel lines. 1. Inspect the carStart by thoroughly inspecting your fuel system while driving to measure how it is operating. You should be able to accelerate and vary your speed quickly, and the vehicle should drive smoothly. The mileage and condition of the engine will have an impact on how the car drives. 2. Check the fuel colorIf the fuel filter on your car is clear, check the color of the fuel. The vehicle’s fuel system has to be cleansed if the fuel seems to be dark. Open the fuel fill area’s lid to get a whiff of the gasoline. If there is a varnish-like odor, the fuel is poor. 3. Check the gas tank & fuel linesCheck the condition of the gasoline tank and the fuel lines. Moisture will enter if any of the gasoline lines are damaged. Regular gasoline tank use may cause it to rust or become fragile over time. 4. Service fuel injector regularly
Remaining gasoline is permitted in the combustion chambers when an automobile’s engine is started. But as the engine cools, the vaporized gases will condense on every surface of the chamber, including the fuel injector and nozzle. As time goes on, the residue could compromise the fuel injector’s efficiency and limit its ability to fuel the engine. Due to the engine’s cooling and heating cycles, impurities might accumulate on injectors. As a result, cleaning them will be much more difficult and time-consuming. It’s not fully preventable, but it’s a good idea to let the engine cool before shutting it off if it’s been working particularly hard (due to high temperatures or a lot of uphill driving). Also, driving more carefully at the end of a trip might help extend the injector’s life. FAQs#1 What happens if you get air in fuel system?Rough idling is one of the most common symptoms of air in the fuel system. This occurs when the engine struggles to maintain a consistent idle speed, causing it to surge intermittently and stall. Additionally, acceleration may be sluggish, and the engine may lose power when driving uphill or at higher speeds. If air has infiltrated the fuel system, the fuel pump may be unable to suck up fuel from the tank since air is lighter than fuel and will bubble up to the top. This can cause the engine to seize up, as the fuel pump struggles to deliver enough fuel to keep the engine running. If the air enters the fuel injectors, it can cause them to overheat and wear out prematurely. It can also cause them to clog, which will reduce fuel efficiency and engine performance. #2 Will air in fuel line go away by itself?Air in a fuel line can dissipate on its own, depending on the situation. If the air is trapped in the fuel line due to a temporary disruption in fuel flow, such as during refueling or due to a malfunctioning fuel pump, it may naturally rise to the top and escape, allowing the fuel to flow freely again. In such cases, the air bubbles will usually be displaced by the incoming fuel and be purged through the fuel system. However, if the air is continuously entering the fuel line due to a persistent issue such as a leak or an air intake problem, it may not go away on its own and may require attention. Air in the fuel line can cause various problems, such as reduced fuel efficiency, poor engine performance, and even engine damage if not addressed promptly. #3 How can I fix the air in my vehicle’s fuel line?You’ll want to find the bleed screw to remove the air from the line. This is typically located near the fuel pump. Loosen the screw with a wrench, and then turn on the engine. Fuel should begin to come out of the bleed screw. Allow the fuel to continue flowing out of the bleed screw until no more air bubbles are present. This may take a few minutes. Once all the air has been removed, tighten the bleed screw with your wrench. Be careful not to overtighten it. #4 What happens if there is too much air and not enough fuel?If there is an excessive amount of air and not enough fuel in the fuel mixture being supplied to an engine, it can result in several issues, such as:
#5 What happens if I don’t fix air in the fuel system?
If you don’t fix the air in your fuel system, it can cause a number of problems with your vehicle. These issues include:
Therefore, diagnosing and repairing any air in your fuel system promptly is important to avoid potentially costly repairs and poor performance.
#6 Can I drive with air in the fuel system?
It is not recommended to drive with air in your fuel system. The air can cause a number of issues, such as poor performance and increased emissions. This can be both dangerous and illegal in some areas, so it is best to diagnose and repair the issue promptly.
If you do decide to drive while there is air in the system, be aware that the engine may stall or experience loss of power. Your fuel economy will also suffer due to excessive fuel consumption, causing you to spend more money on gas over time and potentially expensive damaging components such as injectors, fuel pumps, and other related parts.
Final WordsWhen you see any of the symptoms mentioned above, your car engine is plagued by air in the fuel system, try to fix it if you can, or you can take it to a reputable mechanic. The best thing you can do is prevent the problem by doing a good service maintenance period. Make sure that all of your fuel system components are sealed and not leaking, especially the gaskets holding them together. Further Reading:
Via https://automotivegearz.com/air-in-fuel-system-symptoms/
0 Comments
When it comes to maintaining the appearance and longevity of your car, regular cleaning is essential. However, traditional car washes and detailing may not be enough to remove stubborn iron particles that adhere to the surface of your vehicle. Iron contaminants, commonly known as iron fallout or brake dust, can cause unsightly rust spots and damage to the paint if left untreated. To effectively tackle this problem, using a high-quality iron remover is crucial. In this article, we will explore the best iron remover for cars available in the market and guide you in choosing the right one for your car. Understanding Iron ContaminationBefore diving into the list of best iron remover for cars, let’s go through some critical terms: What is Iron Fallout?Iron fallout refers to tiny iron particles that settle on the surface of your car. These particles primarily come from brake pads and rotors, which release iron dust when they come into contact during braking. Iron fallout can also come from industrial fallout, railway dust, and other environmental contaminants.
How Does Iron Fallout Occur?When your car comes into contact with these iron particles, they adhere to the surface due to the electrostatic attraction. This can happen even if your car is regularly washed and waxed. Over time, these particles can cause paint damage, leading to rust spots and a deteriorated appearance. Why Do We Need to Remove Iron Fallout?Prevents Paint DamageIron fallout can penetrate the clear coat and create small rust spots on the paint surface. If left untreated, these spots can expand and cause further damage. By using an iron remover regularly, you can prevent this type of paint damage and maintain the overall condition of your car. Enhances Paint Clarity and GlossIron particles damage the paint and diminish the clarity and gloss of your car’s finish. Removing iron fallout restores the smoothness and shine to your vehicle’s paint, giving it a rejuvenated and pristine look. Understanding Iron RemoversWhat is Iron Remover?An iron remover refers to a specific type of cleaning product designed to remove iron contaminants from the surface of a vehicle. Iron removers are formulated with special chemicals that can dissolve or break down iron particles, making them easier to remove without damaging the underlying surface. Don’t be shocked if you see the iron remover solution turns purple or reddish as it reacts with the iron contaminants, indicating the presence of iron particles. Iron removers are commonly used in the detailing and car care industry as a part of the decontamination process before polishing, waxing, or applying protective coatings to the vehicle. How Iron Removers WorkIron removers work through a chemical process known as chelation. Chelation is the formation of a complex between a metal ion, in this case, iron, and a chelating agent present in the iron remover solution. Iron particles are commonly found on the surfaces of vehicles and can be stubborn to remove. Traditional washing methods may not effectively eliminate these iron contaminants, as they strongly bond with the surface. When an iron remover is applied to the affected area, the chelating agent in the solution reacts with the iron particles. The chelating agent forms a complex with the iron, which weakens the bond between the iron and the surface. This chemical reaction results in a color change. The iron particles, upon reacting with the iron remover, typically turn purple, reddish, or brownish. The color change indicates that the chelating agent has chemically bound the iron particles.
As the iron particles become loosened from the surface, they can be easily rinsed away with water or wiped off with a microfiber cloth. The iron remover effectively dissolves and removes the iron contaminants, leaving the surface cleaner and smoother. It’s worth noting that iron removers are generally safe to use on most automotive surfaces, including paintwork, wheels, and glass. However, it’s important to read and follow the instructions provided by the specific iron remover product you are using, as some formulations may have limitations or specific recommendations for application. Read More: How to Decontaminate Ceramic Coating Factors to Consider When Choosing an Iron Remover for CarsIf you have looked around, you might find a long criteria list to help you choose the best iron remover. Here, I want to emphasize the three most factors: SafetyOpt for an iron remover that is safe to use on various surfaces, including paint, glass, and wheels. Ensure the product is pH-neutral and does not contain harsh chemicals that could damage your car’s finish. EffectivenessLook for an iron remover that has proven effective in removing iron fallout. Check customer reviews and testimonials to gauge the performance of the product. A highly effective iron remover will dissolve and loosen the iron particles, making them easy to rinse off. Ease of UseChoose an iron remover that is user-friendly and convenient to apply. Ideally, it should come in a spray bottle or a trigger sprayer for easy and precise application. Besides, a product that changes color when it reacts with iron particles can be helpful as it indicates the product is actively working. Top 5 Best Iron Remover for Cars 2023#1 Best Overall: CarPro Iron X Cherry
Sale

CARPRO IronX Iron Remover:...
CarPro Iron X Cherry is a professional-grade product created to remove rust on your vehicle. Professionals favor this product as it is designed to remove any type of rust on your car or truck. There is no worry about the safety of the product as it’s pH neutral and acid-free. Additionally, you can apply it to different materials (except plastic) without damaging them. The price of CarPro Iron X Cherry may be high for some users, but if you want to get the best results, you should consider this product. The cherry scent gives this product an added bonus because iron removers usually smell very bad. It comes in a convenient spray bottle that makes application easy, especially when you are on the go as the easy application is what we all look for. Pros
Cons
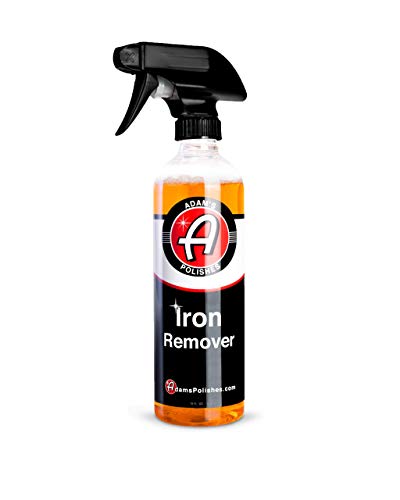
Check out this video for detail! #2 Most Popular on Amazon: Adam’s Iron Remover
Sale
Adam's Polishes Iron Remover...
Adam’s is one of the most common names among auto detailers. Thus, Adam’s Iron Remover won’t disappoint you. This product has had more than 9,000 ratings on Amazon. It is designed to remove iron fallout, particles, and other metals that will look terrible on your car if left unattended. This product is great for removing rust from your car’s paint, engine, wheels, and other parts. As a safety precaution, Adam’s has added a fresh scent to the product to prevent skin irritation, but its smell is still quite strong. Moreover, this remover dries quickly, preventing the formation of ugly spots on your paint. The non-abrasive formula has no hazardous chemicals that could damage your car’s surface. It is safe to use on oxidized surfaces, such as those in your vehicle’s trunk and behind your wheels. One thing I don’t like about this item is its container. Still, the container is quite practical and easy to use. For this reason, I would rate Adam’s Iron Remover 4 out of 5 stars. Pros
Cons
Find Out: 3+ Recipes Bird Poop Cleaner Homemade for Cars #3 Bilt Hamber Auto Wheel
Bilt Hamber Auto Wheel 1...
This product is like the lord of wheel cleaners. It can be voted as the best iron remover for wheels. It cleans and removes all kinds of road rash and iron fallout. Also, it removes water stains from your rims to keep your vehicle looking good as new. It can quickly tackle rusty areas and make the wheels shine again. It is a gentle formula that will not harm your rims or other parts underneath your car. It is a perfect wheel cleaner for people with rusty car wheels. You can also use it to clean your rims, chrome, and other surfaces on the vehicle. As the name suggests, this product is ideal for wheels, but it also works on other surfaces as well. The only thing I dislike about this item is its smell. It’s too strong that it can give you a headache. So I suggest you wear a facial mask when using it and store it carefully. Pros
Cons
#4 Gtechniq W6 Fallout
Gtechniq W6 Iron and General...
Another best fallout remover is a product by Gtechniq. It is made for removing old paint deposits, iron particles, and road rash. It can also be used to remove brake dust and other kinds of debris. It is safe to use on your vehicle’s paint job because it has no chemicals or harmful acids to damage your car’s finish. It helps get the spots off the paint by minimizing the surface tension that produces residue. Also, it’s very easy to apply. It comes in a spray-on bottle so you can just spray it on rusted areas. But one thing you should remember is to keep it away from the sunlight to get the best results. For me, this is great value for the buck because it is great for removing iron particles from your car’s paint job. Again, one minus point of this iron remover is its smell. It isn’t very pleasant. Pros
Cons
#5 Griot’s Garage 10948 Iron & Fallout Remover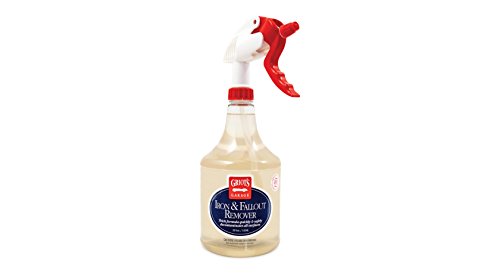
Griot's Garage 10948 Iron &...
The last item I want to mention is Griot’s Garage Iron & Fallout Remover. This product is for removing fallout particles, rust, and road grime on your car. If you are looking for an easy way to remove iron particles, this product will work really well. Just spray the chemical on the dirty areas and let it sit for a few minutes. This product is very effective without causing any damage to the vehicle’s paintwork. It will not harm your car’s interior since it is pH neutral and contains no acids. One thing I like about this item is that it comes in a spray-on bottle, making application very easy. You can spray it on any areas that need to be cleaned and wipe off the dirt with a microfiber towel. Unfortunately, Griot’s Garage Iron & Fallout Remover doesn’t come in large bottles. You have to buy a spray bottle for each application. Pros
Cons
Where Does Iron Fallout Come From?It’s normal for your car to have a little rust after driving it through the water, especially when parked in the rain. However, when you see pools of rust accumulating on the floorboards or under your car, it may be time to buy an iron remover. Here are some common origins of iron fallout:
Read More: Best Car Wash Soap – Keep Your Car Looking Like New Types of Iron RemoverThree main iron remover types are liquid, paste, and gels. Each type has its own advantages and disadvantages.
How to Use an Iron RemoverTo get the best results from your chosen iron remover, follow these steps: Step 1. Preparing Your VehicleEnsure that your car is parked in a shaded area and cool to the touch. Thoroughly rinse the entire vehicle to remove loose dirt and debris. Step 2. Application ProcessShake the iron remover bottle well before use. Spray the product generously onto the affected areas, focusing on the paint surfaces where iron fallout is present. Allow the iron remover to dwell for a few minutes, typically as indicated in the product instructions. Step 3. Agitation and RinseUsing a soft brush or sponge, gently agitate the treated areas to enhance iron particle removal. Pay attention to areas with heavy contamination. Finally, rinse the entire vehicle with a steady stream of water, ensuring all traces of the iron remover and loosened contaminants are washed away. Check out this video for more detail! Common Mistakes to Avoid When Using Iron RemoversWhen using iron removers, it’s important to be aware of common mistakes to ensure optimal results and avoid potential issues. Here are some common mistakes to avoid when using iron removers: Not wearing protective glovesIron removers often contain strong chemicals, so it’s crucial to protect your hands by wearing gloves. This helps prevent skin irritation or potential chemical reactions. Applying in direct sunlight or on a hot surfaceIt’s best to apply iron removers in a shaded or cool area. Direct sunlight or hot surfaces can cause the product to dry too quickly, reducing its effectiveness. Additionally, the heat may make it more challenging to rinse off the product. Allowing the iron remover to dry on the surfaceIron removers are designed to be used on wet surfaces. If you leave the product to dry on the surface, it can become difficult to remove, potentially leading to staining or damage. Ensure that the surface remains wet or keep misting it with water if needed. Using iron removers on non-recommended surfacesWhile iron removers are generally safe for use on automotive surfaces like paint, wheels, and glass, it’s important to check the product’s instructions for any limitations or specific recommendations. Avoid using iron removers on sensitive materials like bare aluminum or certain types of plastics that may be susceptible to damage. Not agitating the productTo enhance the effectiveness of the iron remover, it’s often recommended to agitate the product gently using a soft brush or sponge. Agitation helps break down and loosen the iron contaminants, improving the overall cleaning process. Overextending the dwell timeIron removers have a recommended dwell time, which is the period the product should be left on the surface to react with the iron particles. It’s crucial not to exceed the recommended dwell time, as it may lead to undesirable effects such as staining or etching. Neglecting to rinse the surface thoroughlyAfter the dwell time, make sure to thoroughly rinse the surface with water. Inadequate rinsing can leave behind residue or chemicals that may affect the appearance or durability of the surface. Homemade Iron Remover for CarsIn case you can’t access a commercial iron eater for cars to eliminate iron spots on car, I have some fantastic homemade recipes here: Vinegar or Lemon JuiceBoth vinegar and lemon juice contain acids that can help remove rust. Apply either vinegar or lemon juice directly to the affected area, and let it sit for a few minutes to allow the acid to break down the rust. Scrub the area gently with a soft brush or sponge, and rinse with water. Find Out: Will Vinegar Damage Car Paint? Baking Soda PasteMix baking soda with water to create a paste until it forms a thick consistency. Apply the paste to the rust spots, and let it sit for a few minutes. Use a soft brush or sponge to scrub the area gently, and rinse off with water. Baking soda acts as a mild abrasive that can help lift the rust. Aluminum Foil and WaterTear off a small piece of aluminum foil and dip it in water. Gently rub the wet foil over the rust spots, applying light pressure. The combination of aluminum foil and water can help remove rust through a gentle abrasive action. Rinse the area with water afterward. What Are Some Tips for Using an Iron RemoverBeside all the steps I have mentioned above, here are some helpful tips that you should keep in mind: #1 Choose the right conditions It’s best to apply an iron remover in a shaded or cool area. Avoid applying it under direct sunlight or on a hot surface, as this can cause the product to dry too quickly, reducing its effectiveness. Ensure the surface you’re treating is cool to the touch. #2 Wear protective gloves Iron removers often contain strong chemicals, so it’s important to protect your hands by wearing gloves. This will prevent any potential skin irritation or adverse reactions to the product. #3 Apply the iron remover evenly Use a spray bottle or applicator to evenly apply the iron remover solution to the affected areas. Ensure that the entire surface is covered, allowing the product to work on all the iron contaminants. #4 Repeat if necessary For heavily contaminated areas or stubborn iron particles, it may be necessary to repeat the process to achieve optimal results. #5 Follow up with paint protection After using an iron remover, consider applying a protective layer such as wax, sealant, or a paint coating to enhance the durability and appearance of the surface. This will help prevent future iron contamination and maintain the cleanliness of your vehicle. Frequently Asked QuestionsCan I use an iron remover on all types of paint finishes?Yes, most iron removers are formulated to be safe for use on various paint finishes, including clear coats, single-stage paints, and ceramic coatings. However, checking the product label or manufacturer’s instructions for any specific recommendations or precautions is always recommended. How often should I use an iron remover on my car?The frequency of using an iron remover depends on various factors, such as your driving conditions, exposure to iron contaminants, and the overall condition of your car’s paint. As a general guideline, it is recommended to use an iron remover at least once every three to six months or as needed. Regularly inspect your car’s paint surface for signs of iron fallout and treat it promptly. Check out this video for more detail! Can I use an iron remover on the wheels and brake components?Yes, many iron removers are safe for use on wheels and brake components. They can effectively remove iron particles that accumulate on these surfaces. However, it is advisable to refer to the product instructions or consult the manufacturer to ensure compatibility with specific wheel materials or finishes. Are iron removers safe for use on glass?Yes, iron removers are generally safe for use on glass surfaces. They can help remove iron fallout and other contaminants from the glass effectively. However, avoid using iron removers on hot glass surfaces or in direct sunlight to prevent the product from drying too quickly and potentially leaving residues. Can I apply wax or sealant after using an iron remover?After using an iron remover, applying a wax or sealant layer is recommended to protect your car’s paint. The iron remover will have stripped away any existing wax or protective coatings, leaving the paint exposed. Applying a fresh wax or sealant layer will provide an additional barrier against contaminants, including iron particles. Final ThoughtsAll of the above are well-priced iron removers to remove any fallout particles from your car. It can also be used to remove rust from wheels, engines, exterior parts, and other surfaces. Please note that it works best in areas that are not too close to the vehicle. The cleaner stuff will not work so great if it’s too close or for other surfaces like chrome or plastic. Also, KEEP IT AWAY FROM SUNLIGHT because this could ruin its effectiveness. Further Reading: Via https://automotivegearz.com/best-iron-remover-for-cars/
Are you experiencing paint issues in your car? Wondering what takes the paint off cars? The problem is that if your paint is chipping away, it can be an inconvenience for you. If the issue is serious enough, then it may need to be tackled by a professional detailer or body shop. However, there are measures one can take themselves to remove the offending paint before it becomes too great of an eyesore. What Takes Paint Off Cars FastThere are many items and products that can strip away the paint and I want to put them in 3 categories:
1. Using Chemical StrippersFirst of all, I want to mention that there are many options for stripping the paint and you should look into them and see whether they meet your needs and your budget. What Are Chemical Paint Strippers?When talking about getting rid of paint issues on cars, you will need to know what the specific chemical is that removes the paint so we can figure out how it works. Let’s take a look at a few common paint removing chemicals that you can use to remove the offending paint. What Does Acetone Remove?Acetone removes all types of paints. You should be very careful when using it because it is known to cause damage to rubber seals, plastic and vinyl. Acetone is not a good option to use if you have any aftermarket parts on your car as they might not survive the acetone as well as the original factory parts. How Long Does Acetone Take to Work?Acetone is extremely effective when it comes to getting rid of the paint. It has the ability to not only strip the paint but also remove any sealant. That means that you will need to use an abrasive scrub brush to break up the sealant crusts that are left behind by Acetone. Acetone is not the best option if you are after the final finish on your car. Its primary purpose is to strip the paint but does not finish anything. If you are looking for a great finish, then Acetone will not do this for you. It needs to be followed by an abrasive polish or pads to take away any remaining residue that is left behind. What Does MEK Strips Paint?Methyl Ethyl Ketone (MEK) is primarily used in stripping paints and sealants. It has the ability to pull out any oils in your paint so it can be used in combination with other products like acetone. MEK will remove all types of paints but I would recommend using them in combination with substances that are designed to clean up oils. How Long Does MEK Take to Work?Methyl Ethyl Ketone (MEK) takes quite some time to strip away paint. Its main purpose is stripping oil and it’s very good at doing this. But, it does take time to do the job. Additionally, you should use gloves when using MEK because it can cause skin irritation to some people. If you are worried about getting your hands or clothing messy, then this option is not the best one. It will take quite some time for this chemical to work so just be aware of that before you start working with it. What Does Lacquer Thinner Strip Paint?Lacquer thinner is used to strip away lacquer-based paints. It also works extremely well at removing grease and oil from your cars so it’s a great option if you have a lot of greases stuck in your car. How Long Does Lacquer Thinner Take to Work?Lacquer thinner takes quite some time to strip away paint from your car. This is because it can remove the surface tension of your paint allowing the layers to separate from one another. Is Lacquer Thinner Toxic?Yes, lacquer thinner is toxic and can cause severe harm to you if not stored properly. 2. Using mechanical paint removalIf you take your car to a garage, it’s a high chance that they will use an automated paint remover. How Does the Paint Stripping Machine Work?Paint stripping machines are designed to remove paint from your car. They do this by using heat and pressure to separate the layers of paint that are on your car. The paint strippers can be set on different options for different types of paints and sealants. What Aftermarket Products Work with this Machine?The paint stripper machine uses either hot air or steam to get the job done. This will ensure that the paint is not damaged along the way. With this machine, you can remove overpainted, cracked, chipped and faded paint easily. This machine will also work with many types of sealants. You may be wondering why it would work on some sealants and not others. A common reason for this is because their properties are different for different users. I don’t want to talk more about that as I am sure that you have a lot of questions. What Aftermarket Products Do Not Work with this Machine?If you have any aftermarket parts on your car, then it might not work with this paint stripper machine. So make sure that any aftermarket parts are removed from the paint cavity. If they are removed, then it would work perfectly fine with this machine. How Long Does it Take?This machine is very fast when removing paint from your car. For instance, you can get a complete paint removal in about 30 minutes. It can stop and start like using an abrasive pad to remove the paint which can get quite boring but it will get the job done. How Safe Is Using a Paint Stripping Machine?I would not worry about the safety of these machines as they are manufactured for professional use with professional equipment. If you are using this machine to remove paint from your car, then you will be very safe as long as you follow all the instructions and guidelines that come with the machine. How Much Does it Cost?The price of these machines depends on their quality and what they can do for you. You can find cheaper versions but pay attention to their quality. Paying less does not always mean that you are getting a great product so make sure to do some research on this matter before buying anything. 3. Manual paint removalThe last method I want to mention is to use sandpapers to take the paint off a car. While this is not the best option, it can get the job done when you are in a hurry. How Does It Work?The sandpaper will work by rubbing off the paint that is on your car with sandpaper. The more layers you have, the more sandpaper you will need. For instance; your factory paint with an additional layer of clear coat would definitely be harder to remove than an aftermarket paint job. What Aftermarket Products Work With Sandpaper?You can use sandpaper to remove most aftermarket paints. These paints are usually very easy to work with. Factory paints are not suited for this method because their layers are too thick and therefore requiring more time and effort for removal. What is the difference between using sandpaper on factory paint vs aftermarket paint?This is because of the layers that they have. The layers on aftermarket paints are usually very thin (such as single stage or basecoat/clearcoat). Factory paints are more difficult to remove because they have many layers on the paint. These layers are very hard to remove with sandpaper because of their thickness. How Long Does it Take?It will take you longer to remove paint with sandpaper than using an automated machine or MEK. But this method will get the job done when you don’t have any alternative. Final WordsI would say that it will be best to avoid sandpaper if possible. You can buy a paint stripper machine from a car parts store for about $50-$150 depending on the type of machine you want or using a combination of some chemicals to get the best results. Via https://automotivegearz.com/what-takes-paint-off-cars/
“Can you drive with loose caliper?” If you’re one of the many drivers whose car suffers from a loose caliper, then you know what it does to your driving. Whether it causes an unexpected slip while driving on the highway, or has other serious consequences like overheating your brakes and overheating your entire system, there are some truly inconvenient consequences associated with this defect. As annoying as it might be to deal with loose calipers, driving with loose calipers is dangerous as they’re supposed to be secured. Caliper FunctionsBrakes rely on the calipers to apply force to your brake pads. Calipers are often called the “pads” on your vehicle’s brakes because they’re responsible for pressing your brake pads against your rotors (and sometimes even other parts). If a caliper is loose, you’ll need to fix that before you ever start driving with it loose, or if it already started causing problems, then more serious problems might be looming. What Is a Loose Brake Caliper?A loose brake caliper is part of a vehicle’s braking system that can cause severe damage if it is not properly maintained. It is an important component of the disc brakes, and its purpose is to secure the brake pads against the spinning rotor to allow for efficient braking. A loose brake caliper typically occurs when the mounting bolts or pins become loose or corroded, causing them to no longer hold the caliper in place properly. This can lead to excessive vibration, reduced vehicle stability, and increased wear on other parts of the braking system due to improper alignment. The risk of a loose caliper increases with age as well as from road salt or dirt entering into the components leading to rust and corrosion. Signs of a Loose CaliperA loose caliper might cause problems like:
You should always be aware of odd changes in the way your brakes feel or function. You should be especially concerned if you started feeling or noticing any of these symptoms after an incident that could have caused damage to the calipers. Accidents and road debris impact are the most common causes of this kind of damage. Loose brake caliper bolt symptomsLoose brake caliper bolt symptoms can include:
If left unchecked, a loose caliper bolt can cause premature wear to the vehicle’s brakes, causing reduced braking efficiency and potentially leading to an unsafe situation. Other problems might cause some of these symptoms. Not all of them have to point to a problem with the calipers. However, you should always get a professional mechanic’s opinion before driving with a loose caliper. What Causes a Caliper LoosenSeveral factors can impact the tightness of brake calipers. Here are the most common causes: Issues with the braking systemThe most common cause of a caliper loosening is improper installation or over-tightening of the mounting bolts. This can lead to an imbalance in the system, causing the caliper to vibrate and eventually become loose. Negligence and lack of proper maintenance, like not replacing brake pads in time or not getting regular inspections done on time or at all. If your brakes are damaged due to negligence, you should look into your car insurance policy to see what kind of coverage you have for this kind of damage. Wear & tearOther causes include corrosion of the bolts and fasteners due to weather conditions, lack of maintenance, and wear and tear on the caliper itself over time. Road debrisRoad debris, such as gravel and stones, can also damage the caliper’s components, leading to looseness. Many said this is the most common cause. Other factorsFinally, suppose a vehicle has been in an accident or experienced sudden jolts or shocks during its drive. In that case, this can also cause the caliper to loosen due to unexpected shifts in forces. Can You Drive With Loose Caliper?
Of course, the answer is NO! If you drive with a loose caliper, you are at risk of damaging your brakes and possibly your whole vehicle. If they are loose, not secured in place with the correct hardware, or even if they are secured but are not working properly, they’re very likely to cause problems. If you’re already in an accident due to a loose caliper, you’ll have more problems at fault that will affect your auto insurance premium. Don’t gamble on being able to drive with a loose caliper. For example, I was on a freeway in Texas in the summer of 2019 and witnessed an accident related to a loose caliper. While driving at highway speed, the driver’s front left caliper came loose, causing intense vibrations and wobbling from the wheel. The driver quickly noticed what was happening and began to slow down as they pulled onto the shoulder. Fortunately, the driver managed to stop without incident, but had they not noticed or been able to react quickly enough, the resulting crash could have been fatal. How To Fix Loose CalipersYour vehicle owner’s manual should have instructions on how to fix loose calipers. You should not have this kind of trouble if you regularly get your brakes checked for any signs of problems. Tools You Will Need:
How To Tighten Up Loose CalipersMake sure your car is on jack stands or parallel to the ground. Brake dust can be very hazardous if inhaled while working with brakes. So, you should always wear a mask when working on them. You should also have a fume extractor in case you are not wearing a mask while working with brake dust inside your nose or mouth.
What to Do if You Have a Loose Caliper on The RoadItems needed:
If you have a loose caliper, the first step is to park your car in a safe location and make sure that the parking brake is engaged. After that, you must locate the caliper and loosen its mounting bolts with a wrench or socket set. Make sure to disconnect any brake lines connected to the caliper. Next, remove the wheel bearing from its hub assembly with a puller tool. Then, clean any dirt or debris around the bolt holes on the caliper bracket using compressed air or an aerosol spray cleaner designed for automotive use. Once done, reinstall the wheel bearing and secure it with a new retaining clip or nut. Finally, tighten the caliper bolts and reconnect any brake lines before testing your work by pressing on the brakes several times. Check out This Video for How to Replace a Brake Caliper Frequently Asked Questions#1 How do you prevent a loose caliper?A loose caliper can be prevented by regularly lubricating the mounting bolts with a silicone spray and periodically checking that they are tightened properly. It is important to make sure the brake lines connected to the caliper are not frayed or cracked, as this could lead to a loose caliper over time. Finally, replacing worn-out wheel bearings and retaining clips is important in preventing a loose caliper. #2 What products are best for cleaning car brakes?Aerosol spray cleaners specifically designed for automotive use are the best option for cleaning car brakes as they are formulated to quickly and effectively remove dirt, grime, and brake dust buildup from the brakes and calipers. In addition to using a spray cleaner, it is also important to use a clean rag or sponge to wipe away any residue left behind after spraying. For more stubborn grime buildup, an automotive-grade clay bar can safely remove embedded dirt without damaging the brake components. Finally, proper lubrication of the brake system components, such as bearings, slides, and caliper pins with a silicone-based lubricant, helps ensure smooth operation and improved brake performance. #3 What is the cost of fixing a loose caliper?The cost of repairing a loose caliper depends on the cause of the issue and any additional parts that may be needed. Generally, the cost ranges from $50 to $250 for labor and can range up to around $400 or more, depending on the parts. It is important to consult with a professional mechanic to understand all of your options before attempting to fix the problem yourself. #4 How many brake caliper bolts are there?
The number of brake caliper bolts depends on the make and model of your vehicle. Generally, there are between two and four bolts that attach the caliper to the wheel hub assembly. If you’re unsure how many bolts your car has, consult a professional mechanic. #5 What is the cost of brake caliper replacement?The cost of replacing the brake caliper will depend on several factors such as labor costs, parts required, and the make and model of your vehicle. It is best to consult with a professional mechanic to get an accurate estimate for the cost of brake caliper replacement. They can also recommend any other related repairs that may be needed. #6 Do I need special tools to replace brake calipers?For most vehicles, basic hand tools should suffice when replacing brake calipers. However, some vehicles may require specialized tools such as Torx head screws or spring tensioners. #7 What should I look for when inspecting brake calipers?When inspecting your vehicle’s brake calipers, you should look out for:
If any of these components appear worn or damaged, it is best to replace the caliper #8 Can I drive with one caliper bolt?
No, you should not drive with one caliper bolt. Driving with a missing or loose caliper bolt can cause serious damage to your brakes and may even lead to an accident.
Wrap UpAll in all, learning how to recognize loose calipers, knowing what causes them, and understanding the potential risks they pose can help you identify if and when it’s time to visit the mechanic. Remember not to wait too long since the longer you do, the more likely you will permanently damage your brakes and other parts of your car. Loose calipers are definitely something that should be addressed promptly in order to maintain a safe driving experience and avoid any costly repairs down the line. Further Reading:
Via https://automotivegearz.com/can-you-drive-with-loose-caliper/
No driver wants this to happen but sometimes the car runs out of gas without them knowing. So, how to start your car after running out of gas? The process may not be as you think it is. In this article, I’ll show you how to deal with this issue. How to Start Your Car After Running Out of Gas?
The reason for this is that during the time you refilled the fuel tank, gasoline going in the tank evaporates a little bit and forms a vapor in there, and this vapor needs some time to leave the tank and settle down. And once this thing happens, just fire up your engine and you will be able to run your car normally. Another reason for waiting is that it takes some time for the fuel to reach the combustion chamber. At the first start it might take up to 30 seconds for the fuel to reach the cylinder, so don’t give up right away. Then, it’s time to prime. There may be some air inside the fuel system and priming will let the air out and the fuel can flow freely. You can prime by turning the key on and off a few times before starting it. If this trick still doesn’t work, try to check if there are any clogs in your fuel lines. And if you have some mechanical skills, you can always change your fuel pump together with filters. But I don’t recommend doing that unless you are sure that this is your problem. What Happens When You Let The Car Run Out Of GasLeaving the gas tank empty can cause some damages to the car itself. Here are some possible problems: When the fuel tank is empty, the car starts running on internal combustion. That means that some parts of your car are working with air, and not only with the fuel. This causes your car to overheat quickly, which can cause serious problems. The engine itself works with air too, so if you let the gas tank empty for a long time it will start to overheat more quickly too. And if it overheats enough, it will crack its head or explode. The part that is most affected is the fuel pump as well. It’s a delicate mechanism that works with air, and if it gets empty, the fuel pump will start to produce an annoying noise. It can also cause your car not to start at all. What If Your Engine Runs On DieselIf you own a diesel car and it’s out of fuel, don’t start it for at least 10 minutes. Diesel doesn’t evaporate as quickly as gasoline, so waiting is not needed here. But it will allow the liquid fuel to spread inside the tank, which will make it easier for your engine to run on diesel. And of course, if you still don’t succeed in starting your car after running out of gas, you can always call a tow truck or schedule an appointment with a mechanic who will help you solve this issue. The effect of air inside the diesel fuel system is much worse than the gas ones since many components inside like the fuel pump or injectors can be broken and you can’t start the car at all. If this happens, you will need to call a mechanic for help. Final WordsWhen you run out of gas, the car continues to work until it reaches a critical temperature. That’s when you get a very unpleasant smell from inside your car too. It’s better not to let this happen but in case it does, I hope you’ve got some ideas to deal with it properly now. Via https://automotivegearz.com/how-to-start-your-car-after-running-out-of-gas/
Do you know the difference between oil weights? If not, don’t worry! I’ve got you covered. This post is going to answer your burning question: Can you mix 5w20 and 5w30? How does this mix affect the engine? The short answer is YES, you can mix 5w20 & 5w30 given that they’re from the same brand and API. However, experts still don’t recommend it as the engine can’t reach its peak performance with mixed oils. The below explanation will let you know why we can do that. Understanding Viscosity of Oils
Oil weight refers to a measurement of viscosity, which is a lubricant’s resistance to flow at a given shear rate. Viscosity matters because it dictates an oil’s ability to protect your engine against wear and tear. Viscosity is also what helps an oil clean your engine’s surfaces. Let’s start with the numbers. The 5w20 is the designation of a viscosity that ranges between 10,000 cSt (centistokes) to 14,000 cSt (centistokes). The 5w30 is the designation of a viscosity between 15,000 cSt (centistokes) to 20,000 cSt (centistokes). This means 5w30 operates on a higher range of thickness than 5w20. How Are These Two Oil Viscosities Different?The 5w30 designation refers to the base oil viscosity, which is 10% thicker than the standard 5w20. For example, a 5w30 motor oil has an API GL-5 rating, but the same base oil could have an API SN GL-4 rating. These are just examples since there are other classification systems used in motor oils, but they’re common ones. Even though they’re called “w” weights, these numbers don’t actually refer to weight at all. Instead, the w stands for winter. “Winter” motor oils are designed to handle longer periods of cold weather and protect against engine wear from starts and stops in cold weather. So basically, the “w” doesn’t directly correlate with weight. In the case of an engine that uses a mix of oil weights, the 5w20 and 5w30 may show up in different percentages at different times. For example, an owner may take their car to their local mechanic for an oil change and ask for a specific weight. The mechanics will actually weigh the oil and give you a recommendation based on your engine’s needs. If you need anything over 7 quarts (7 liters), you can tell them to use 5w30 instead of 5w20. Here is the summary:
Why You Should Use 5W20 & 5W30 OilsBelow are some of the benefits of using 5w20 and 5w30 oil:
Can You Mix 5W20 and 5W30?
Yes, you can top up your 5W20 with 5W30 or the other way around. Keep in mind that it’s probably not a good idea to mix the two oils, because 5W30 is thicker than 5W20 but the mixture won’t harm the engine anyway. It’s generally accepted that mixing different weights is better than using one weight for your engine. The reasons are that it’s better for your car to have a wide range of viscosities available. Different viscosities provide different cleaning and lubrication abilities, which is important for keeping your engine clean and problem-free. What’s more, this prevents the thinning effect that happens when using a thin oil for too long. What Happens if You Mix 5w20 With 5w30?If you mix 5W20 with 5W30 oil, the result will be an oil with a viscosity somewhere between the two oils. The viscosity of the oil affects how well it flows through the engine and lubricates its components. As we are all aware that mixing 2 different oils is not recommended, same as these two. Mixing 5w20 and 5w30 motor oil is not recommended because the two motor oils have different viscosities. This means that they will not be able to mix together to form a single homogenous solution, and the varying viscosities of each oil can lead to uneven lubrication of engine parts. The lighter 5w20 may flow more quickly than the thicker 5w30 and can cause premature wear in some areas due to inadequate lubrication, as well as sludge buildup in other areas due to excessive lubrication. So, how does the mixture of 5W20 oil and 5W30 affect the engine? Will we get a result that is a bit of a compromise between the two? Well, it does more harm than good. Here are a few possible effects of mixing these oils:
What Ratios can I Mix 5w30 with 5w20?Although mixing the two fluids together may not harm your engine, experts still don’t recommend it as the engine can’t reach its peak performance with mixed oils. However, in an emergency, if you need to top off an engine with 5W30 oil that is already full of 5W30 oil with 5W20 oil, you should use more of the heavier 5W30 oil and less of the thinner 5W20 oil. For example, in a 5W30 engine, you might use two parts 5W30 oil and one part 5W20 oil, and vice versa. You should read the owner’s handbook to make sure you use the correct ratio if your engine allows mixing of both oils. Is 5W30 Compatible with A 5W20 Engine?
Because 5W30 oil has a greater viscosity and would be too thick for the 5W20 engine’s components, which need a thinner barrier, it might not be a good idea to use it in a 5W20 engine. As the oil would be too thick to pass through, the engine parts would not receive adequate oil coating, which might lead to overheating, wear and tear, and oil starvation. Additionally, the engine components would encounter increased resistance as they moved against one another. When combined with 5W20 oil, 5W30 oil may be secure in 5W20 engines. What Is Engine Oil 5w20 Good For?Engine oil 5w20 is an excellent choice for vehicles that are operated in cold climates. This oil is designed to maintain good lubrication at low temperatures, which makes it ideal for winter driving conditions. It also provides better fuel economy and reduces wear and tear on engine components, making it a great option for those who want to keep their vehicle running smoothly, even in cold weather. Another plus point is that this type of oil can be used in most modern cars without the need for special modifications or additives. It helps reduce emissions while delivering improved performance and increased engine life. What Is Engine Oil 5w30 Good For?Engine oil 5w30 is an essential component of car maintenance and provides numerous benefits to the engine. Mechanical benefits include:
At colder temperatures, 5w30 oil flows more easily than thicker oils so that it can reach all the components of your engine quickly and easily. This means it will provide better protection during cold weather starts when your vehicle has been sitting for a while. Similarly, at higher temperatures 5w30 is thinner compared to other oils and allows less heat transfer which helps to keep temperatures consistent throughout the entire engine. The worst thing that can happen to your engine over the summer is that the oil deteriorates; this speeds up wear and could even result in engine knocking. Utilize 5w30 during the summer to prevent this. Overall, 5w30 oil offers excellent protection for your vehicle’s engine over a wide spectrum of operating conditions from start-up in cold weather to hot summer days spent on long drives. Are There Any Benefits of Mixing Engine Oils?Not really. There hasn’t been any scientific proof on this matter. Some people may benefit from mixing oils, but this is only a temporary fix. The long-term effect of mixing engine oils is that this act may lead to faster wear and tear of your engine. Also, changing the amount of base oil in your engine will require a new oil filter and an oil change. So if you’re mixing 5w20 with 5w30, you’ll probably need to change the oil again in just a few thousand miles. Here are some thoughts on mixing oils from giant oil companies: Chevron stated on their site that different viscosity grades of the same brand of motor oil might be combined without compromising system performance. However, combining multiple brands is not recommended as it could lead to an inconsistent product with a different overall viscosity than intended. Shell Canada‘s expert team explains that mixing viscosity grades like a 5W30 low-viscosity oil with a 10W40 higher-viscosity oil can lead to an overall product of thicker consistency than the former but thinner than the latter. Despite this change in thickness properties, their experts assure users there is no danger of any incompatibility arising from combining different engine oils. At Mobil 1, they always suggest that customers follow their engine manufacturer’s recommendations for selecting a viscosity grade. If you’re ever in doubt about which one to choose, simply refer to your owner’s manual. Additionally, if an individual already has the Tri-Synthetic Series motor oil from them there is no need to mix two different SAE grades – just stick with the same type of formula recommended by your vehicle manufacturer. Final Thought on Mixing 5w20 & 5w30To conclude, you can mix 5W20 & 5W30 provided that they’re from the same brand and API. If you want to come up with your own oil mixture, just check the oil number of the two oils. For example, if they’re 5W-30 and 10W-30, then you can use 80% of the amount of the 5W-30 and 20% of 10W-30. A piece of advice: if you want to prolong your engine’s life, use synthetic oils as they bring various benefits to the motor engine. Further reading Via https://automotivegearz.com/can-you-mix-5w20-and-5w30/
Are you always trying to find out the answer to the question “can you put 10w30 in a 5w20 engine“? So you have some oils left of each type or you’re on the road and in need of topping up. This article will give you the answer. As mentioned in other blogs, mixing oils is not recommended but you can mix them sometimes without causing harm to the engine. So, 10w30 & 5w20 can be combined together. Can You Put 10w30 in a 5w20 Engine?Even though these two oils are different in viscosity, you can mix them together. A 10w30 engine can easily take a 5w20 oil or vice versa. The difference in weight of these two oils is only 8.7%, which is not that significant. In the case of a 10w30, it will have a viscosity of approximately 10w28, and a 5w20 will have a viscosity of approximately 5w22. The viscosity 10w28 is quite close to the one of a 10w30. The difference in weight between a 5w20 and a 5w22 oil is larger than the difference between a 10w30 and a 10w28. So, there is no reason why you cannot mix these two oil types. The differences between these two oils are mostly in additives and not in the base oil. So even if you put a 5w20 oil in a 10w30 engine, it will not cause harm to the engine. However, we do not recommend this mix for extended periods of time. Helpful TipsHere are some helpful tips that will help you determine whether or not your car’s oil capacity is the same as the amount of oil listed on the bottle.
ConclusionTo conclude, mixing 10w30 & 5w20 oils is allowed. You can do this without any worries. However, it is not recommended you do this for an extended period of time. Just make sure to mix them at least 3 months before you actually need to use them together. If you don’t, the oil life will be shortened by shortening the mixing time between each of these oils. Via https://automotivegearz.com/can-you-put-10w30-in-a-5w20-engine/
Can you mix fully synthetic with semi-synthetic oil? In a quick Google search, you can find that many people say that yes, you can mix synthetic and semi-synthetic oils. However, the majority of people recommend using fully synthetic oil if it is going to be used for engines with high mileage. This post will explore the differences between synthetics and semis as well as their pros and cons for your engine. Fully Synthetic Oil & Semi-Synthetic Oil: The Pros & Cons
Fully Synthetic Oil Vs Semi-SyntheticThe main difference between synthetic and semi-synthetic oils is in detergents. Semi-synthetics will typically contain much less detergent than synthetics, so they only go so far when cleaning your engine. If you use a semi-synthetic oil in your engine, it will need to be changed out much more often than if you were using a full synthetic. If you are looking at price, there can also be a big difference. Full synthetics are usually quite expensive, while many semi-synthetic oils are much cheaper. Fully Synthetic Oil Vs Semi-Synthetic Oil For Your EngineFully synthetic oils are recommended if you have high mileage on your vehicle. Because they have more detergents than semi-synthetic, they will be able to clean better. If you have used a semi-synthetic for your car and it is now at high mileage, you should switch to a fully synthetic one. However, if you are looking for cheaper oil, a semi-synthetic is the way to go. But remember that it won’t be as good at cleaning as a full synthetic. Overall, it is safe to say that full synthetics should be used for engines with high mileage and semi-synthetic oils should be used at lower mileage. Of course, there are many other factors that you should consider when choosing an oil, so please read more below. Can You Mix Fully Synthetic With Semi-Synthetic Oil?Absolutely! There is no problem mixing them together. However, you will want to change the oil more often if you mix the two different types of oils together. So like the title says, yes you can mix the two oils together. If you want to be on the safe side, just use fully synthetic oil and you will be fine. Final WordsYou can mix the two oils together if you want, but you will need to change the oil more frequently depending on your specific engine. Is better to use a fully synthetic oil than mixing semi-synthetic with fully synthetic oil. You should use full synthetic oil in your vehicle if it has over 75K miles on it or if it is high maintenance. Via https://automotivegearz.com/can-you-mix-fully-synthetic-with-semi-synthetic-oil/
Get the latest and greatest cars and trucks, but we all know that sometimes you need to go beyond the regular oil change. That’s where the debate of high mileage oil vs synthetic oil comes in. Running a high-mileage engine on synthetic helps protect against gasket failure, as well as those pesky oil leaks that plague many engines. If you’re not sure what to do, then this post has got you covered. High Mileage Oil Vs Synthetic OilWhat is High Mileage Oil?High-mileage oil is an oil that has been engineered to help extend the life of your engine. It can be used in the replacement of high-mileage conventional oils. There are many benefits to high-mileage oil, but the most important benefit is that it does not wear out as conventional oils do. High mileage oil is considered the best for high mileage vehicles. It’s made for engines that are constantly running at high speeds, at high altitudes, or operating in hot weather. It is limited to the owner’s manual for these vehicles. What is Synthetic Oil?Synthetic oil is made with molecules that are made in a lab. It is chemically different from conventional oils. High mileage engines or any engine for that matter can handle synthetic oil. Unlike high mileage oils, synthetic oil does not have the limitations of high mileage oils. The ComparisonsThe similarities between these two types are that they both protect your car’s engine, and they both lubricate the engine. However, that is where the similarities end. High Mileage OilThis type is used to reduce the wear and tear of engines, and it helps to extend the life of your engine. It is best used in older vehicles. The biodegradable formula protects seals and gaskets, which helps to prevent oil leaks that often occur in older engines. In terms of price, it’s more expensive than synthetic oils. To get the most out of it, it usually needs to be changed at least every 6,000 to 10,000 miles depending on the engine of the vehicle. Also, if you want to get help with changing your high-mileage oil, dealerships or mechanics often offer services to help you do this. Synthetic OilSynthetic oil does not wear out fast, so it does not have to be changed as often as other conventional oils do. This means less frequent trips to the shop for oil changes. Synthetic oils are extremely reliable and very safe for your engine. However, they don’t contain additives as high mileage oils do. This means that synthetic oils have to be changed at a different time than high-mileage oils do. For the most part, they don’t cost more than regular oil changes for an engine. However, some states consider synthetic oil as a hazardous material so this will result in a higher tax on the synthetic oil you buy. Final WordsHigh-mileage oils last longer but synthetic oils are more cost-effective and have fewer problems with them leaking, burning, or causing any other damage to the engine. Both oils can be used in any engine regardless of their age. It’s best to follow the manufacturer’s recommendations that come with your engine. They both protect and lubricate the engine and that’s what is really important. Both oils are good for your car, so the decision is really up to you! Via https://automotivegearz.com/high-mileage-oil-vs-synthetic-oil/
Our cars need oil to operate and that’s why we need a regular oil change to keep our engine at peak performance. The question is “Can you mix synthetic oil with regular oil?” as it’s a norm for some drivers to mix them up. In this article, I’ll give you all information to have the best choice. The short answer to this question is YES, you can mix synthetic oil with regular one but it doesn’t mean that you should do it often. Only when you’re in urgent cases. What Are the Different Types of Oils?On average, you can find three types of oil in your car.
1. Regular/Conventional OilThis type of oil is the most commonly used one. In fact, it’s the best selling oil for cars and this gives this oil a very wide variety. The reason why everyone recommends using this type of oil is that it has low cost and is widely available to everyone. Moreover, it’s a great option if you’re trying to save some money on an oil change. They are a byproduct of crude oil. It’s made by refining crude oil. The process of refining is done by which smaller molecules that are mixed in the oil are removed. This makes the oil a better product to use in your car. 2. Synthetic OilThey’re formulated for specific applications. They’re fully synthetic meaning that they’re made of base oils, additives, solvents, etc. Usually, these oils are high-tech products compared to conventional ones. Synthetic oils can stand high temperatures and pressures, whereas, conventional oils cannot. This is the reason why synthetic oils are recommended for cars that undergo heavy-duty activities like racing and high-end performance. They can provide superior protection, better lubrication and smoother engine operation. 3. Multi-Grade OilsThis type of oil is also a byproduct of crude oil like conventional ones. However, they’re produced by refining the crude oil further to produce more specific molecules with fewer impurities, which can deliver better performance than conventional oils. They’re also formulated for specific applications with their unique properties. Can You Mix Synthetic Oil With Regular Oil in a Car?
How to Mix Synthetic and Regular Oil in a CarOne oil can be used for a certain time and another will be useful after few days. It’s up to you whether you want to use synthetic or regular oil as it’s up to what works best for your engine. In fact, if you see that the engine is not working as well as before, then it means that it needs a change in the type of oil. For example, if your car is running smoothly but the engine sounds rough under the hood then it needs an oil change. When you replace conventional oils with synthetic ones, you should drain the old ones completely. Then use a new oil in a car and check if it’s working better. Remember that if it needs a change in the type of oil, then you should get the right one for your car model. However, if you replace synthetic oils with regular ones, draining is not necessary as these oils are more compatible. You can simply swap synthetic oil with a conventional one. It’s easy to do it yourself without any need for professional help. Just remember to check your car’s manual or the sticker on the oil bottle to see how much time it will be good for. FAQs About Oil Mixing1. If It’s Good To Mix Oils, Why You Shouldn’t?This is a question that many drivers ask. The reason behind this is because mixing oils will degrade the performance of your car. This means that you should use the same oil for a continuous period to prevent this from happening. However, if you have an emergency and you need to mix oils, then it’s okay to use them together. 2. How Long Should Oil Last?The lifespan of your oil depends on your car’s type, how you drive it and how you maintain it. Usually, you should change the oil every 3000-7000 miles or 6 month/1 year respectively depending on what is recommended in your manual or by the manufacturer. 3. How Can You Identify Oils?The easiest way to identify an oil is by reading the sticker on the bottle. For example, if your car is using synthetic oil and you’re not getting any benefits on performance, then you should change its oil for a new one. Via https://automotivegearz.com/can-you-mix-synthetic-oil-with-regular-oil/ |


 RSS Feed
